Learn how to turn any MP3 to video with our practical guide. Discover how to create engaging visual content for social media and grow your audience.
Dan Benyamin
Oct 19, 2025
In This Article
Subscribe to our newsletter
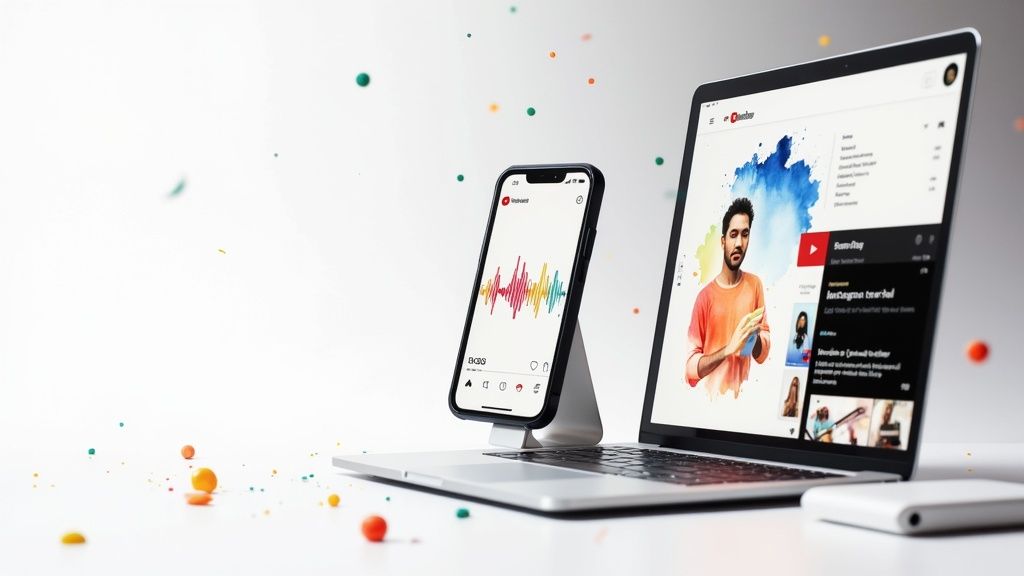
Let's be real: if your content only exists as an audio file, you're leaving a massive audience on the table. Platforms like YouTube, Instagram, and TikTok are built for visuals, and they simply don't have a spot for a raw MP3 upload.
By adding something as simple as a background image or a cool waveform, you can instantly convert that audio into a shareable video, opening up a world of new listeners.
Why Turning Your MP3 Into a Video Is a Smart Move
Think about it from a creator's perspective. A podcaster can't drop a killer soundbite on Instagram Reels. A musician can't upload their new single to YouTube. Not without some kind of visual element, anyway.
This simple conversion isn't just a workaround; it's a fundamental strategy for anyone serious about getting their audio heard in today's media landscape.
Expand Your Reach to New Platforms
Converting your MP3 to a video file immediately solves this distribution problem. It's a game-changer, especially when you start looking into viral video marketing strategies specifically for music and how they can amplify your work.
You’re no longer just shouting into the void of audio-only apps; you're putting your content right where people are already spending hours every day.
The core benefit is simple: converting audio to video makes your content compatible with the platforms where people spend most of their time. It's about meeting your audience where they already are.
Capitalize on a Visual-First World
Video isn't just popular; it's completely dominant. Projections show that by 2025, video streaming and downloads will make up an incredible 82% of all internet traffic. That’s a tidal wave of consumption you can’t afford to ignore.
Making that switch from audio to video unlocks a whole new set of possibilities for your content.
To give you a clearer picture, here’s a quick breakdown of what you gain by turning that MP3 into a video.
Key Benefits of MP3 to Video Conversion
Benefit
Impact on Your Content
Best Platform
Increased Discoverability
Your content becomes searchable and recommendable on video platforms.
YouTube
Higher Engagement
Unlocks visual-based interactions like likes, comments, and shares.
Instagram, TikTok
Broader Audience Access
Taps into billions of users who primarily consume visual media.
All video platforms
Monetization Potential
Opens up revenue streams like ad-sharing and sponsorships.
YouTube, Facebook
Ultimately, this isn't just about getting more clicks. It's about making sure your hard work—your podcast, your music, your message—has the best possible chance to connect with people in a crowded digital world.
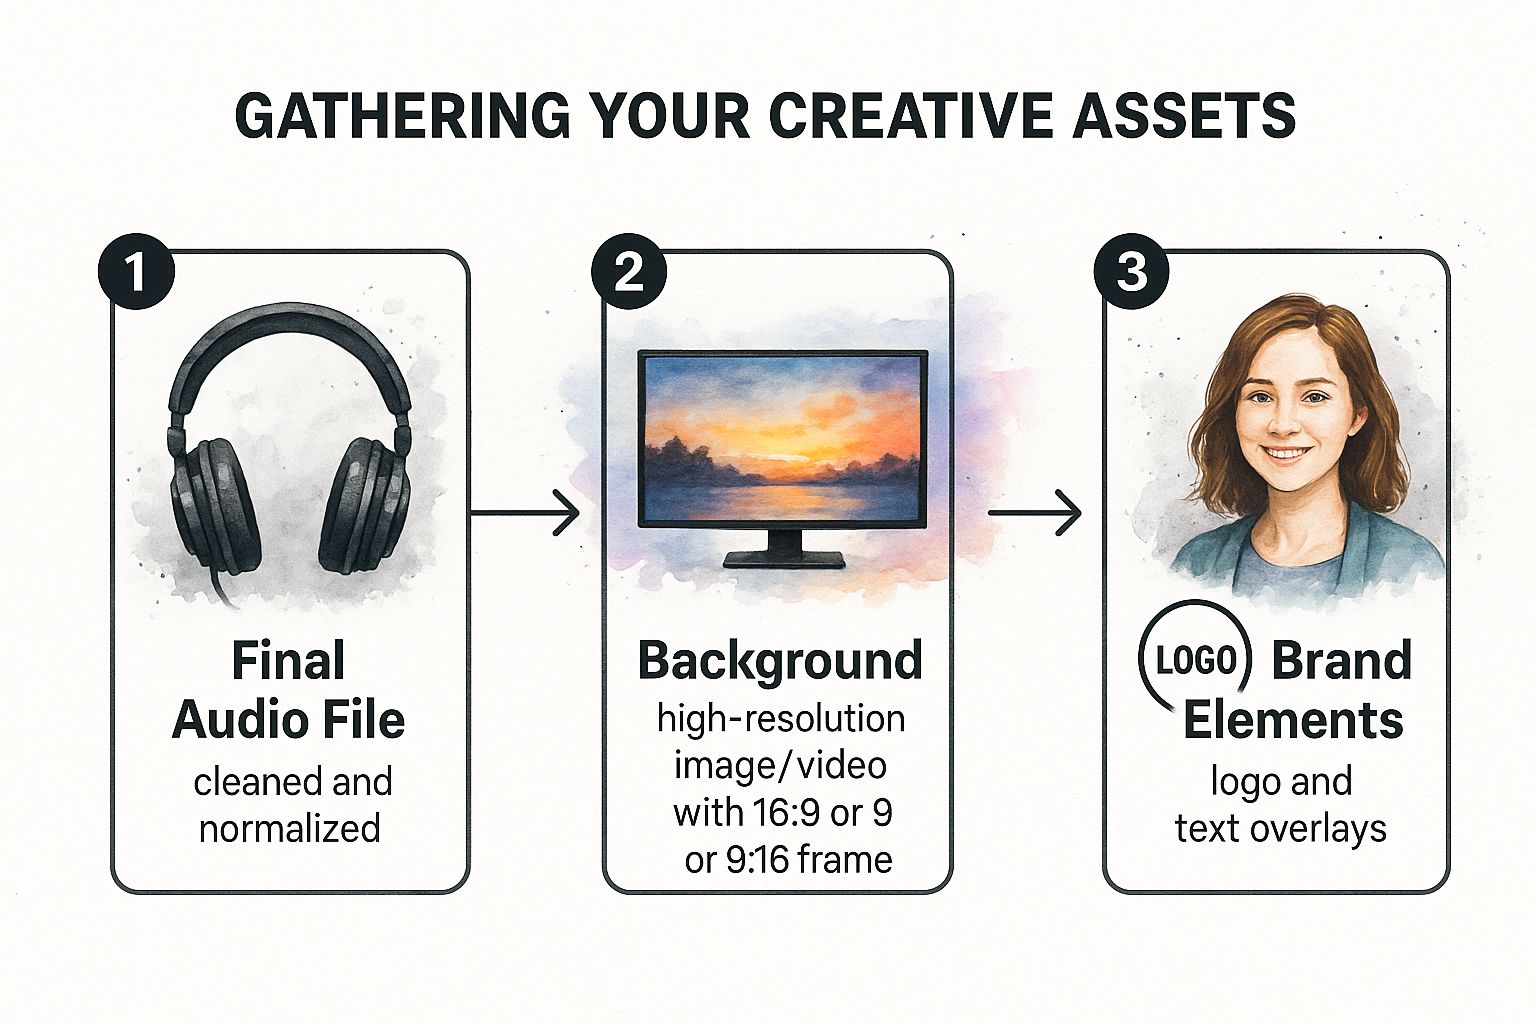
Gathering Your Creative Assets
Before you even think about opening any software, it's a smart move to spend a few minutes getting your materials organized. Trust me, this little bit of prep work makes the whole process of turning an MP3 into a video way smoother. It's like gathering your ingredients before you start cooking—you avoid a last-minute scramble and end up with something much better.
The goal here is to have everything you need ready to go, so you can just focus on the fun, creative parts.
First up, and most importantly, is your audio file. You want to make sure the MP3 you're using is the final, mastered version. Give it a quick listen to check that the volume levels are normalized. You don't want it too quiet or jarringly loud; it needs to sound professional when it’s part of a video.
Choosing Your Visuals
Next, you'll need a background. This can be a static image or even a simple looping video clip, but whatever you choose, it has to fit the vibe of your audio. A calm, instrumental track might look great with a serene nature scene, while a high-energy podcast clip could work better with a dynamic, abstract background.
Pay close attention to the aspect ratio here. If you're making a standard video for YouTube, you’ll need a 16:9 background (think 1920x1080 pixels). But for mobile-first platforms like Instagram Reels or TikTok, you absolutely need a vertical 9:16 format (1080x1920 pixels). Getting this right from the start saves a lot of headaches later.
This quick infographic lays out the simple workflow for getting your assets together.
As you can see, it’s a pretty straightforward flow: audio, then visuals, then branding.
Finally, pull together any branding elements you plan on using. This means things like your logo (a transparent PNG file is always best) and any text you want to overlay on the video, like a song title, your name, or maybe a key quote. Having all this stuff in one place makes the next steps a breeze.
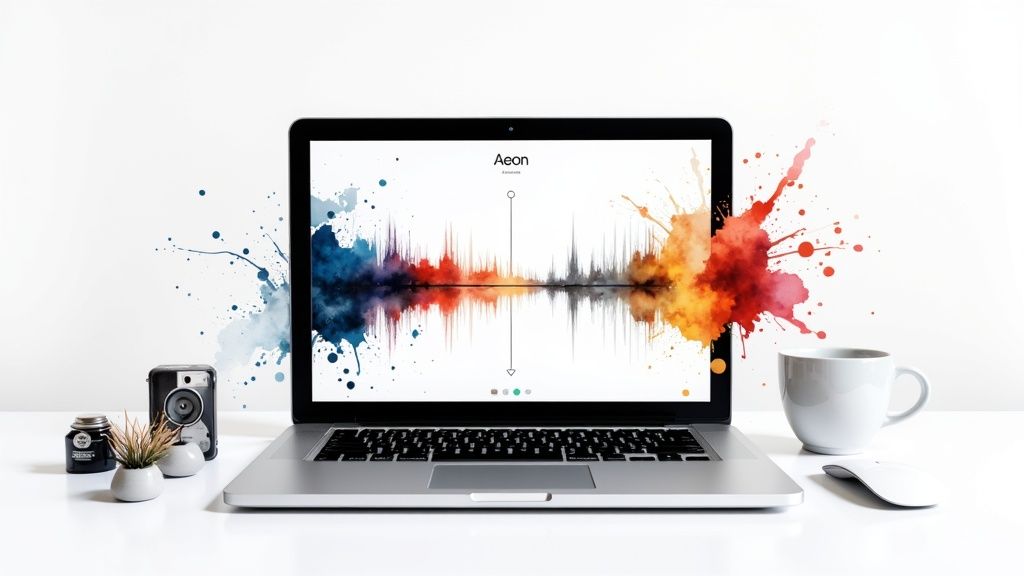
Alright, you've got your audio and visuals prepped. Now for the fun part: jumping into Aeon to actually build your video. Don't worry, this isn't about getting bogged down in technical settings. It’s all about making a few key creative choices to bring your audio to life.
First things first, you'll need to upload your core files. Go ahead and drop in your finished MP3 and the background image you picked out. Aeon’s interface is built to get this done quickly so you can move straight into customizing everything.
Designing Your Visual Experience
With your audio and background loaded, this is where you start adding some flair. A static image is fine, but adding a dynamic element that moves with your sound is what really grabs people's attention.
Aeon gives you a few different audio visualizers to play with. You could go for a classic waveform if you want a clean, professional vibe. Or, if you're after something with a bit more visual punch, a spectrogram might be the way to go. The best part is that you can tweak any style to match your brand's look.
Here's a peek at the interface where all this happens.
As you can see, it’s incredibly straightforward. You just pick your visualizer style and adjust the color until it feels right with your background or brand palette.
Adding Professional Touches and Text
The visualizer adds the motion, but text and branding are what make the video feel like yours. This step is crucial for turning a simple audio clip into a professional piece of content that represents you or your business.
You can easily pop in a text overlay to share key info. If you're a musician, this is the perfect spot for the song title and your name. For podcasters, try pulling a powerful quote from the clip to hook anyone scrolling past.
Beyond the text, don't forget your logo. A tastefully placed logo reinforces who you are without screaming for attention. It’s that final touch that adds a layer of polish and authority.
Pro Tip: When you’re placing your logo, think about the "safe zones" on different social platforms. Keep it away from the absolute edges so it doesn't get awkwardly cropped when people view it on their phones or in different app layouts.
Remember, the goal here is to make your audio sharable, especially on mobile, where almost everyone is watching video these days. In fact, mobile devices are on track to account for over 75% of all video viewing by 2025, and a staggering 92% of users share videos they watch on their phones.
Your short, visually engaging clip is perfectly suited for this world. Videos under 90 seconds often hold onto about 50% of their viewers, which makes these quick MP3-to-video flips incredibly effective. If you're curious, you can dig into some more fascinating video marketing statistics to see just how powerful this format can be.
By pulling these simple but effective elements together, you've created a complete package ready for any video-first platform. All that's left is to export it, and you’ll have a shareable asset ready to reach a much bigger audience.
Okay, you've got the basic video put together. But let's be honest, the difference between a decent video and a great one often comes down to the final touches. It's those small, intentional adjustments that make your content feel professional and custom-made, not just another piece of audio slapped on a background.
We’re going to walk through a few simple techniques that will give your mp3 to video creation that extra layer of polish. These aren't complicated, but they have a huge impact on how your final video looks and feels.
Fine-Tune Your Waveform Animation
The default waveform is a solid starting point, but why settle for default? Dive into the settings and play with the sensitivity. Your goal is to make it react more dramatically to the highs and lows in your audio.
Think about it this way: for a podcast clip, you want the waveform to pulse and breathe right along with the speaker's voice. For a music track, you want it to swell and drop with the beat. It's like choreographing the visuals to the sound, creating a much more immersive experience for your viewer.
Use Color to Set the Mood
Color is a shortcut to emotion. It’s easy to just default to your brand colors, but take a moment to think about the feeling of your audio.
A calm, meditative audio track could be paired with cool blues and soft greens. An upbeat, high-energy song? That’s your chance to use vibrant yellows, oranges, or reds to grab attention.
Don't just pick a color; choose a mood. Your color palette should complement the emotional tone of your audio, creating a stronger connection with your audience from the first second they see it.
A well-chosen color scheme does more than just look pretty—it reinforces your audio's message and makes the whole package more memorable.
Add Captions for Accessibility and Engagement
This is non-negotiable. Adding captions is one of the single most impactful things you can do for your video. So many people scroll through social feeds with their sound off, and without captions, your message is completely lost.
Tools like Aeon make it easy to upload a caption file, usually in the SRT (SubRip Subtitle) format. This simple step makes your content accessible to a much wider audience, including those who are hard of hearing, and drastically boosts engagement from silent viewers. It's not an optional extra anymore; it's a must-have.
Master Your Export Settings
Finally, let's talk about exporting. The "best" settings are totally dependent on where you're posting the video. Using a one-size-fits-all approach is a recipe for poor quality or massive, slow-loading files.
Here’s a quick cheat sheet for getting it right:
For YouTube: Stick with 1080p (1920x1080). It's the standard for crisp HD and looks great on everything from a phone to a desktop monitor.
For Instagram Reels/TikTok: Go vertical with 1080p (1080x1920). This ensures your video fills the entire screen, giving you that native, polished look without any awkward black bars.
For General Web Use: A 720p export is often perfect. You get a much smaller file size that loads quickly, and for most embedded web videos, the quality drop is barely noticeable.
Choosing the right settings from the get-go means your video will look its best on every platform, every time.
So, What Do You Do With Your New Video?
Making the video is really just the first step. The real magic happens when you put it to work. Now that you know how to turn an mp3 into a video, you've got a seriously versatile new tool in your content arsenal. This skill unlocks platforms and engagement opportunities that were totally off-limits when your content was audio-only.
Let's get past the "how-to" and into some practical, real-world ideas. The goal here is to get your creative gears turning and show you just how powerful this simple conversion can be for reaching more people and making a bigger splash.
Ideas for Different Kinds of Creators
The ways you can use this are incredibly diverse, and that's what I love about it. A musician, for instance, could drop a new single as a visualizer on YouTube a few days before the official music video. It's a fantastic way to build hype and capture those early listeners while keeping a steady flow of content between major releases.
A podcaster could grab a powerful 60-second quote from an episode and spin it into a killer audiogram. Think dynamic waveform, bold captions—the whole package. That little clip becomes the perfect teaser for Instagram Reels or TikTok, driving new subscribers back to the full episode.
Even businesses can get in on this. Imagine taking a glowing audio testimonial from a happy client and turning it into a simple, professionally branded video. You can pop that right on a landing page or share it on LinkedIn to build social proof and add a much-needed human touch to your marketing.
The key takeaway is to see your audio not just as a final product, but as source material. Each new video clip becomes another doorway for your audience to find you.
Getting the Most Impact From Your Video
Once your video is ready, it's time to think about distribution. You're not just posting something; you're launching it. To make sure it connects with the widest possible audience, it helps to understand the strategy behind creating effective video advertisements. Even if you aren't running paid ads, those principles can teach you a ton about crafting better titles, descriptions, and calls to action.
Here are a few specific ways I've seen people leverage these videos with great success:
Social Media Snippets: Chop up your main video into short, vertical clips made specifically for platforms like Instagram Stories and TikTok. These are perfect for grabbing attention fast.
Beef Up Your Website: Embed a video version of an audio blog post or a customer testimonial directly on your site. This can seriously increase how long people stick around, which is a great signal for SEO.
Supercharge Your Newsletter: Instead of just linking to an audio file in your emails, embed a clickable thumbnail of your video. Visuals are proven to boost click-through rates in a big way.
Each of these tactics transforms a simple MP3 file into a dynamic, shareable asset that works for you across all your channels.
A Few Common Questions About Turning MP3s Into Videos
Even when the process is pretty simple, a few questions always seem to pop up once you start converting audio into video. I've put together a quick rundown of the most common ones I hear to help you get unstuck and back to creating.
Can I Convert a Really Long Audio File, Like a Full Podcast?
You absolutely can. Most modern tools like Aeon are built to handle hefty files, so turning a full one-hour podcast into a video is no problem.
Just be prepared for longer processing and export times compared to a short clip. It's just the nature of working with more data.
A workflow I've found that works really well is creating two different versions:
The Full-Length Cut: Go ahead and produce the complete hour-long episode. A simple background and a subtle waveform visualizer work great for platforms like YouTube where people might just listen in the background.
Short, Punchy Clips: Pull out one or two of the most compelling 60-second moments from the episode. Turn these into separate, vertical videos and post them on Instagram, TikTok, or YouTube Shorts. They're perfect for grabbing new listeners.
This two-pronged approach gives you the best of both worlds—you serve your dedicated audience and use shareable snippets to grow it.
What's the Best Image Size for My Video's Background?
This one's crucial for a professional look. For the best results, your background image should always match the exact dimensions of your final video. Always start with a high-resolution image to avoid that fuzzy, pixelated look that screams amateur.
Here are the standard sizes you should be using:
Widescreen (16:9): Aim for at least 1920x1080 pixels. This is your standard for YouTube, Vimeo, and most desktop screens.
Vertical (9:16): You'll want 1080x1920 pixels. This is non-negotiable for mobile-first platforms like Instagram Reels and TikTok if you want your video to fill the whole screen.
Getting the aspect ratio and resolution right from the very beginning saves a ton of headaches later. Trust me, it makes the entire process smoother and the final product look infinitely more polished.
Will Adding a Waveform or Visualizer Hurt My Audio Quality?
Nope, not one bit. When you convert an mp3 to video, you're not actually changing the original audio file at all.
Think of it like putting a picture in a frame. The process simply pairs your existing audio track with new visual elements. The sound quality of your final video is determined entirely by the export settings you choose. Most tools let you keep the original audio bitrate, ensuring your sound is just as crisp and clear as it was in the source MP3.
Ready to turn your audio into something people can see and share? Aeon makes it incredibly easy to create professional-looking visualizers and audiograms. Get started for free and see how simple it really is.
Share the article
Contributor
Dan Benyamin
Dan served as VP of Data Products at Condé Nast, following their acquisition of CitizenNet, a social media marketing platform he founded.


.jpg)